

Painting WWII Soviet Winter Uniforms

I’ve grouped the miniatures I received from the Bad Squiddo Games Kickstarter into small batches for painting. In the first batch is the officer, the LMG team, and the six riflewomen in greatcoats.
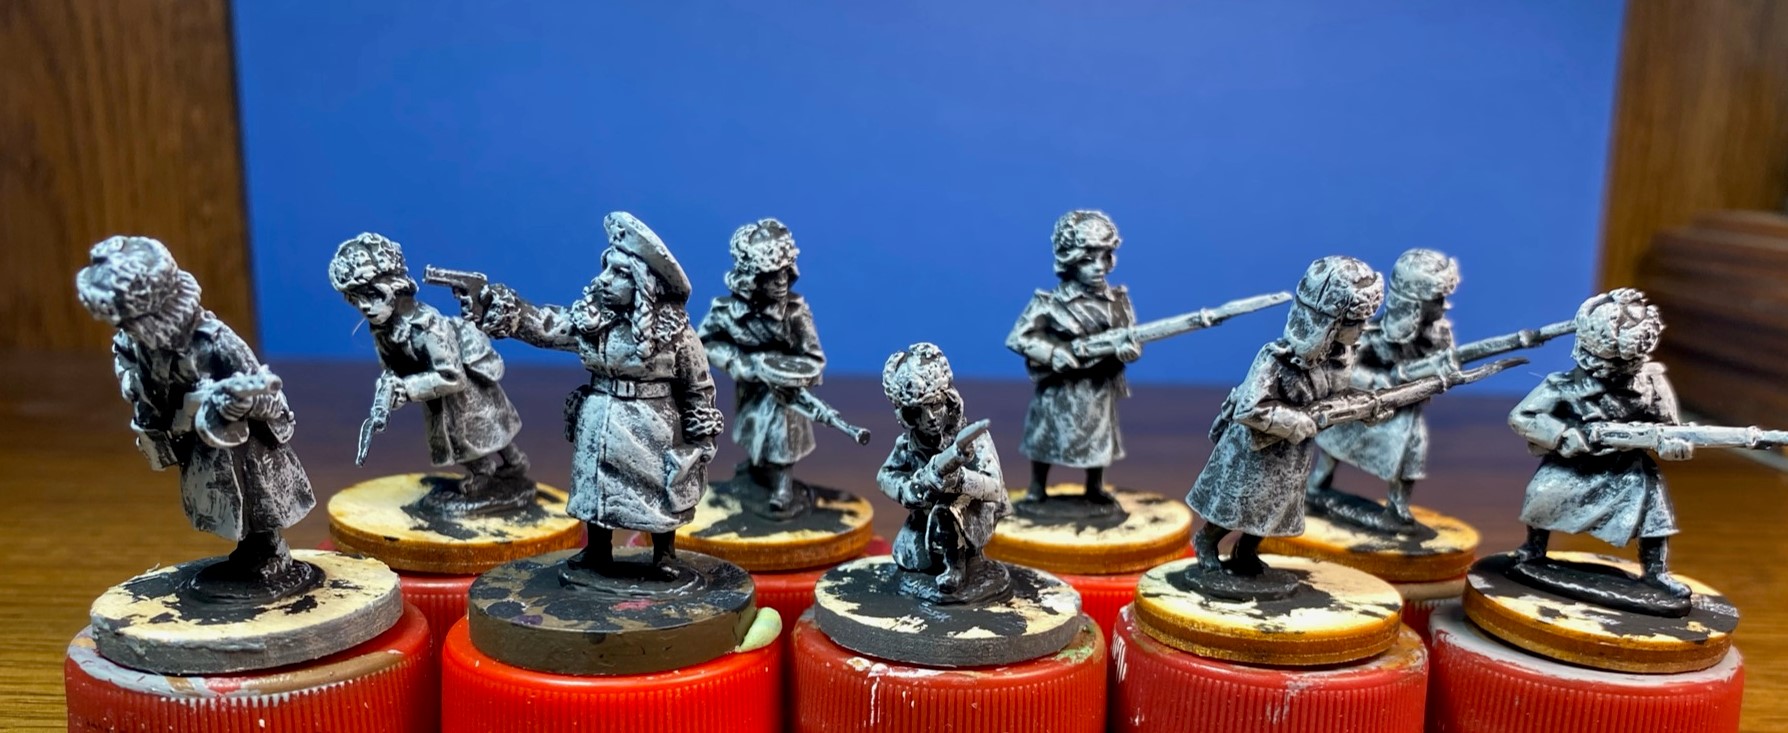
I applied my usual first step in priming the figures with black gesso and adding a zenithal highlight of gray and white. The zenithal highlight brings out the details and shows me where light hits the figure while preserving the deep shadows.

When painting a figure, I approach it in one of two ways, the first is to paint the figure how we dress – the skin, then layers closest to the skin & then the outer layers; and the second is to paint the largest parts first. In this case, I chose to paint the great coats.
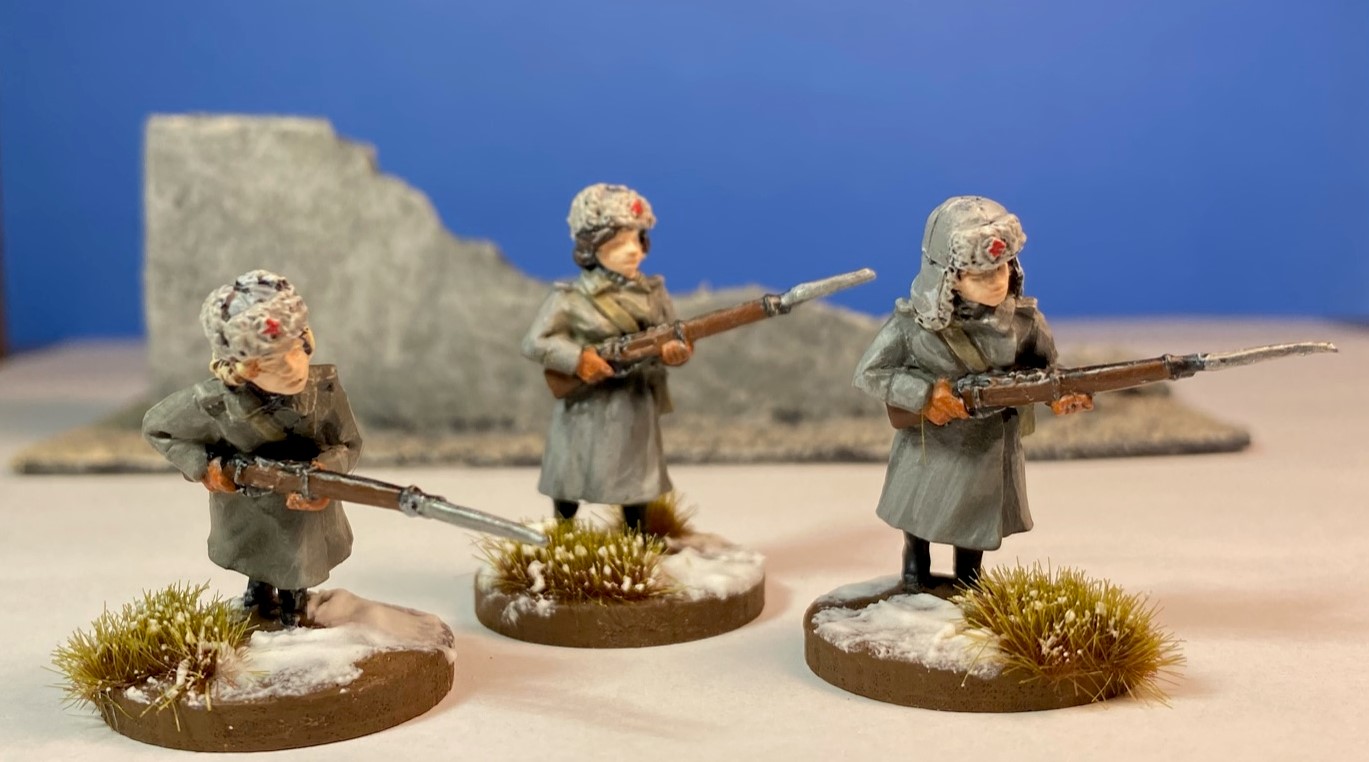
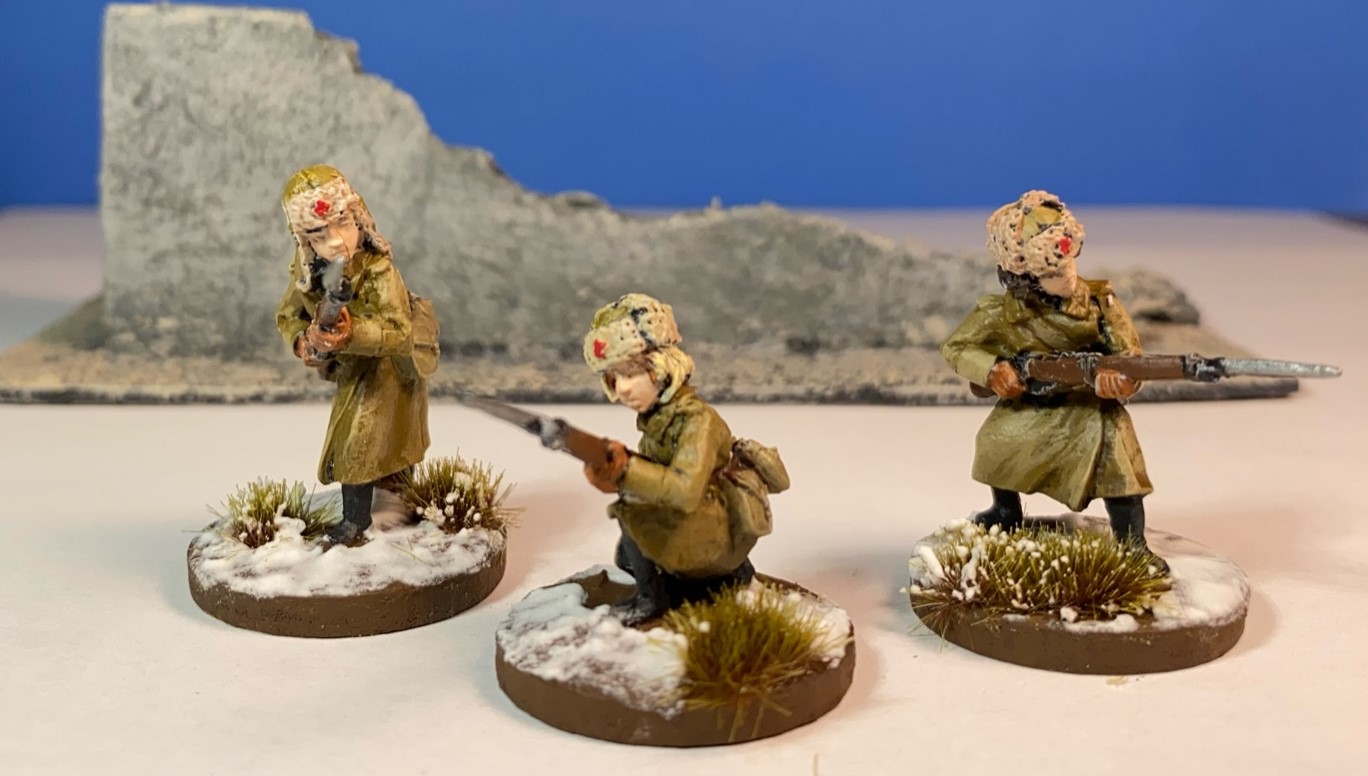
The great coats were in theory dark brown, but ranged in various shades from brown through khaki to mid-gray were used. For the brown coats, I used thin coats of Vallejo English Uniform with highlights of English Uniform mixed with white. For the gray coats, I used thin coats of Vallejo Grey Green mixed with a small amount of English Uniform as the base and highlighted the coats with Vallejo Medium Sea Grey.
A brief note on uniform guides – I made the mistake of buying the Bolt Action Soviet painting guide from Warlord Games and then discovered the free Artisan Designs painting guide from North Star Military Figures. Guess what? – the free guide is more accurate than the Bolt Action one.
You will notice there are no red shoulder boards or collar tips on the great coats. These did not appear on the uniform until 1943 and I’m painting my figures for the 1942 Rzhev campaigns.

I had a bit of spare time, so I painted the bases with Reaper Muddy Ground and painted the faces using Reaper’s Rosy Skin triad (Rosy Shadow, Rosy Skin, Rosy Highlights). In preparation of painting the “ushanka” (ear flap hat), I painted the officer’s beret using Reaper Cyan Blue. Remember to thin your paints – the Reaper paints do not need as much thinning as Vallejo, but they need some, the goal is smooth coats of paint.

Before painting the ushankas, I painted the hair. Brunettes were painted with Vallejo Dark Brown with the tiniest amount of Vallejo Black mixed in. The redhead’s hair color is Reaper’s Chestnut Brown. Finally, the blonde hair was given a very thin coat of Reaper’s Chestnut Brown and then highlighted with Reaper Golden Blonde.
The brown ushankas were painted Vallejo Khaki Grey with Khaki highlights. The fur was painted with a mix of Reaper Creamy Ivory mixed with a small amount of Reaper Chestnut Brown. The gray ushankas were painted with Vallejo Medium Sea Grey and highlighted with a mix of Vallejo Medium Sea Grey and Reaper Creamy Ivory. The fur for the gray caps was painted with the Medium Sea Grey and Creamy Ivory color I used for the highlight. Finally, all of the fur was given a light dry brushing of Reaper Creamy Ivory.

Completing the basecoats, all of the wood, belts and cartridge pouches were painted Vallejo Flat Brown. The web gear and straps were painted with Vallejo German Beige. Gun barrels were painted with Vallejo Gunmetal Grey. Bayonets and belt buckles were painted Vallejo Oily Steel. Gloves were painted with Vallejo Red Leather. The stars on the caps were painted with Vallejo Flat Red. And, finally, the boots were painted with Reaper Coal Black.

The final painting step was to apply a wash to all of the leather and canvas, then do a few final highlights and details, and seal the figures with a coat of matte varnish.
Snow Bases
Well, it is time to do what I’ve never done before – adding snow to a figure’s base. I’ll be using the basic recipe and techniques from an Eons of Battle video found here: How to Create a Realistic Snow Effect
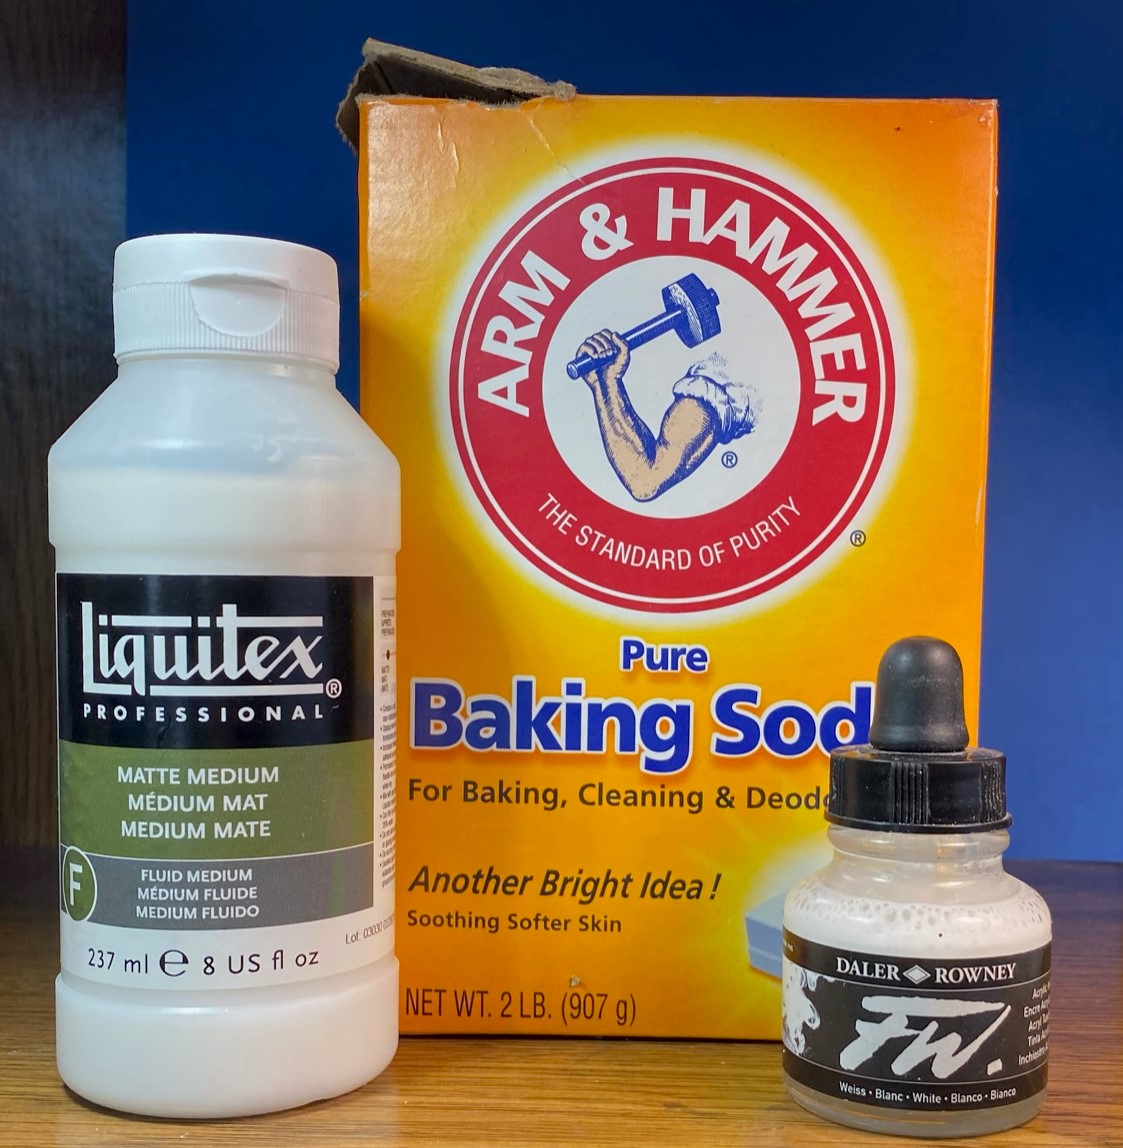
I started with equal amounts of baking soda, matte medium and white ink. Then I added more baking soda until I got the consistency I wanted. Using an old brush, I spread the “snow” mixture on the bases taking care to sprinkle some onto the grass tufts.
The Finished Figures


This may sound like a broken record to some of you, but I really do look forward to your comments and suggestions. I tend to flit from project to project like a deranged butterfly, your comments help me focus on what you would like to see more of on the blog.
Until next time, keep rolling under your Rep and use your Star Power wisely!
If you enjoyed this post, please consider making a small donation to keep things going.
Choose an amount
Or enter a custom amount
Your contribution is appreciated.
Or if you prefer to use PayPal:

A Red October 2021 – donation
A small donation to keep the blog operating.
$1.00


Comments
7 responses to “A Red October 2021”
Great paint job of figures usually neglected by history buffs!
I opted to go with Reaper Walnut Brown for for the boots, highlighted with a dust color (can’t remember what, which is bad since more Soviets are on the table for November!) because I was concerned that pure black would contrast too strongly with their uniforms. Your black boots look good, though. Maybe I should try that next month. I like your approach that not everybody got coats from the same factory/dye lot.
I often use Reaper Walnut Brown for brunette hair and black items that will have a brownish tint to them. I chose Reaper Coal Black for the boots which is a very flat black with a grayish tint since I knew the ground would be muddy brown with snow on top. I’ve also used Reaper Dark Elf Shadow Skin Tone for a gray-black that has a purple tint. Many years ago, I used Payne’s Grey tube acrylic for painting black on horses. There’s really a lot of subtle colors which can be added to black or as a black highlight that can make all the difference in the world as to how it looks on a finished model.
I used Woodland Scenics Snow for my snow monster, and he turned yellow! Perhaps if I try baking soda and white ink over the top of it . . .
Most of the snow basing videos I watched recommended mixing in white paint or white ink to prevent yellowing.
Those are very nice. I really like them.
Cheers,
Pete.
More great work on some very nice figures!