


Good Rules with So-So Army Lists
Another THW Classics rule set available from Rebel Minis is Fortunes Won and Lost. Fortunes Won and Lost is a skirmish set pitting small groups of figures against one another. There have been a few who have confused this rule set with Colonial Adventures, which has Fortunes Won and Lost as a subtitle. Colonial Adventures is a mass combat rule set involving units of troops. Colonial Adventures is very similar to “The Sword and the Flame” and “Contemptable Little Armies” in size and scope.
While I enjoy the rule mechanics of Fortunes Won and Lost, I find the army lists don’t quite fit the games I want to play. In making the lists fit generic tropes, the lists are too restrictive in reflecting the period. Fortunately, all of the character types needed are scattered through the lists, so it is not hard at all to build a custom list for the groups I want to play. For example, the guide in the European Adventurers list is armed with a European Rifle, but the figure I want to use is a Ruga Ruga armed with a rifled musket who can be found in the Tribal Natives list. Suppose I want my adventurers to hire a bearer, instead of using the Rep 3 Local armed with a melee weapon in the Adventurers list, I can use an unarmed Rep 3 Civilian from the Civilians List. So it is possible to build your band with figures you already own with what is represented on the figure.
Unlike Mission St. Mary, which I played recently (see MSM – Chicken Raid for the game report), Fortunes Won and Lost is not a RPG type of game with attributes and character development. It is a straight forward miniature wargame with a campaign system. The campaign is composed of encounters between competing factions and is played until the major morale of a faction reaches zero.
I’ve chosen the campaign to be European Adventurers versus Tribal Natives. From my Mission St. Mary game, I’ve chosen the Okbona as my native tribe and have chosen to use the fictional nation of Nobelongga as the setting. I know I’m a bit eccentric in that I always like to play the underdog, so I will play the Okbona and the game mechanics will play the European Adventurers.

The Okbona
Sticking with the fictional Nobelongga setting, the Okbona live far above the rapids of the Napondi River. The land is heavily forested while slowly giving way to the mountains known to the natives as “Hatua za Mbinguni”. There are rumors the Okbona guard the ancient site “Madhabahu ya Radi,” the altar of thunder, most likely they just live near where the site is purported to be. The few Arab Slavers who have ventured into the area insist the Okbona are fierce cannibals.
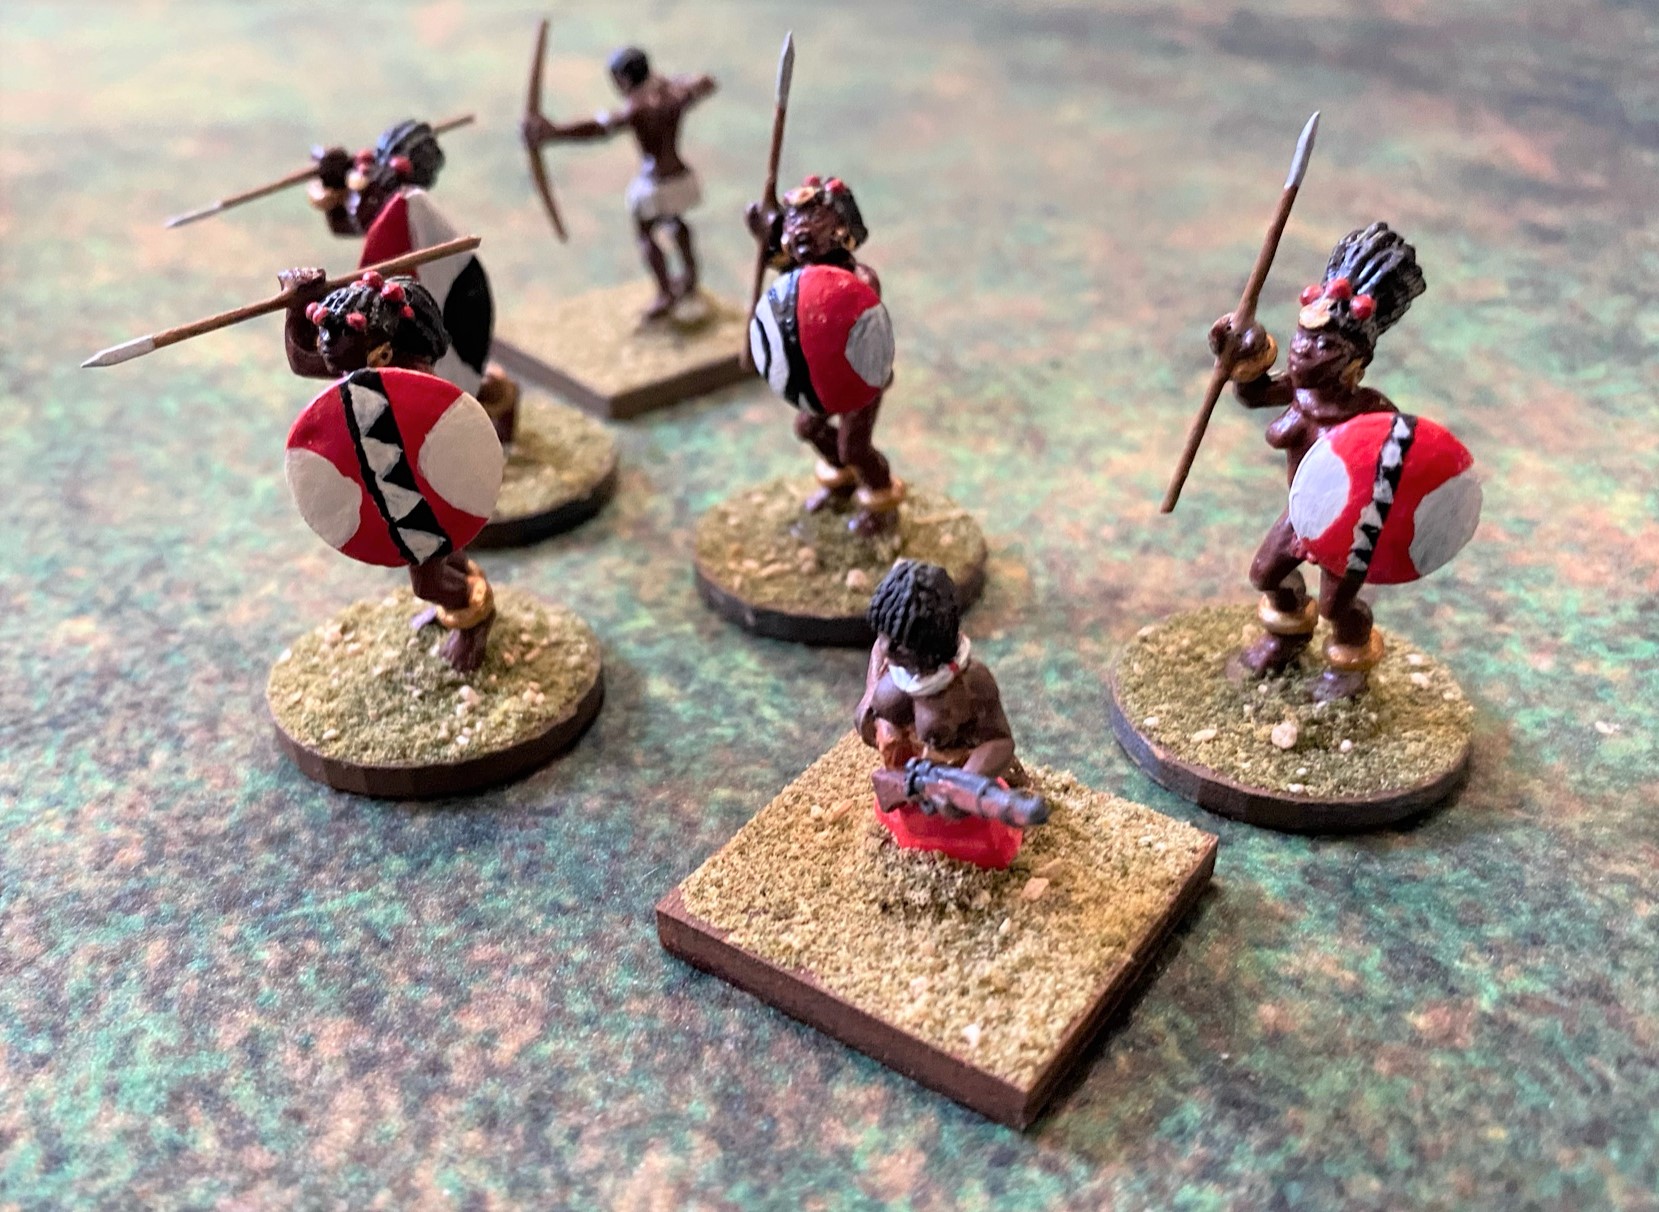
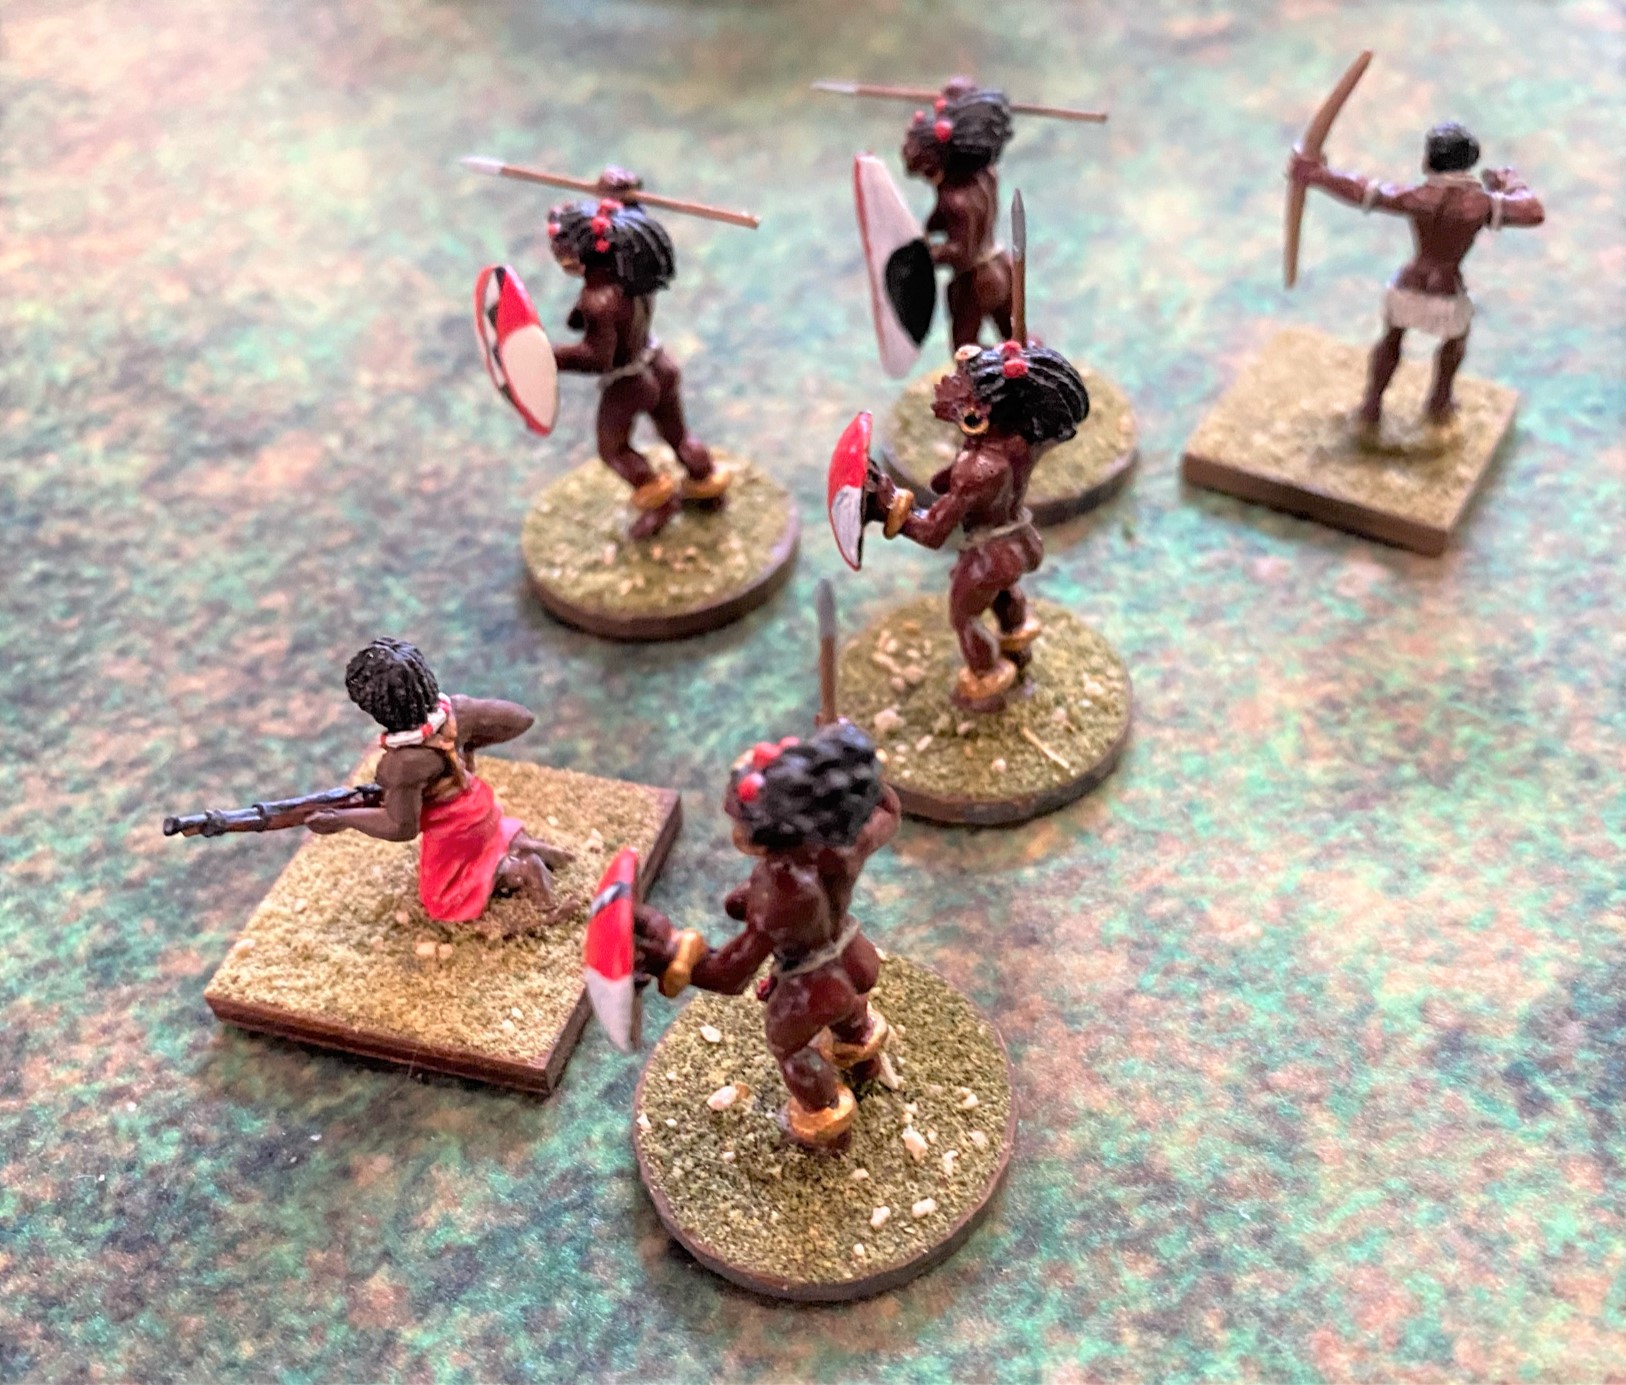
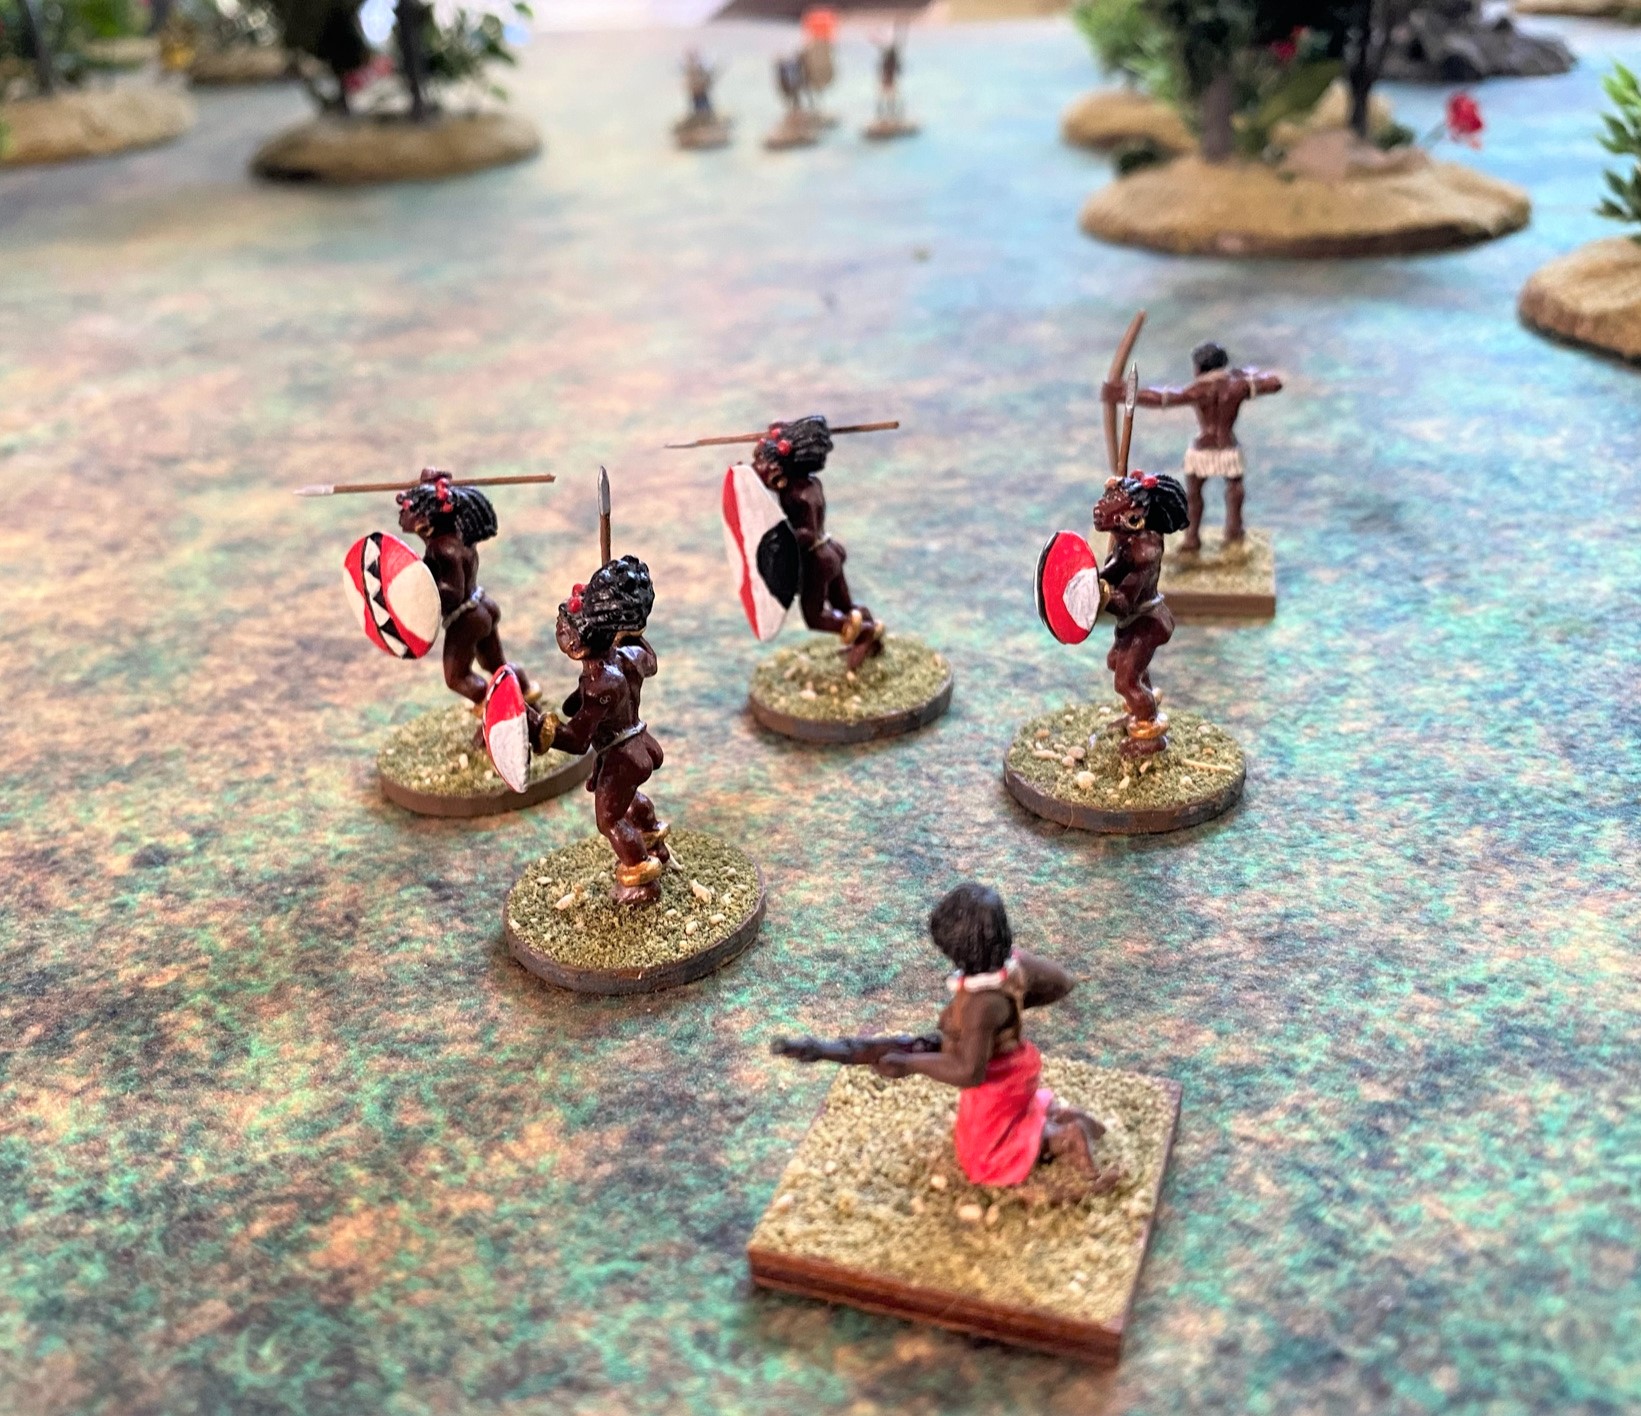
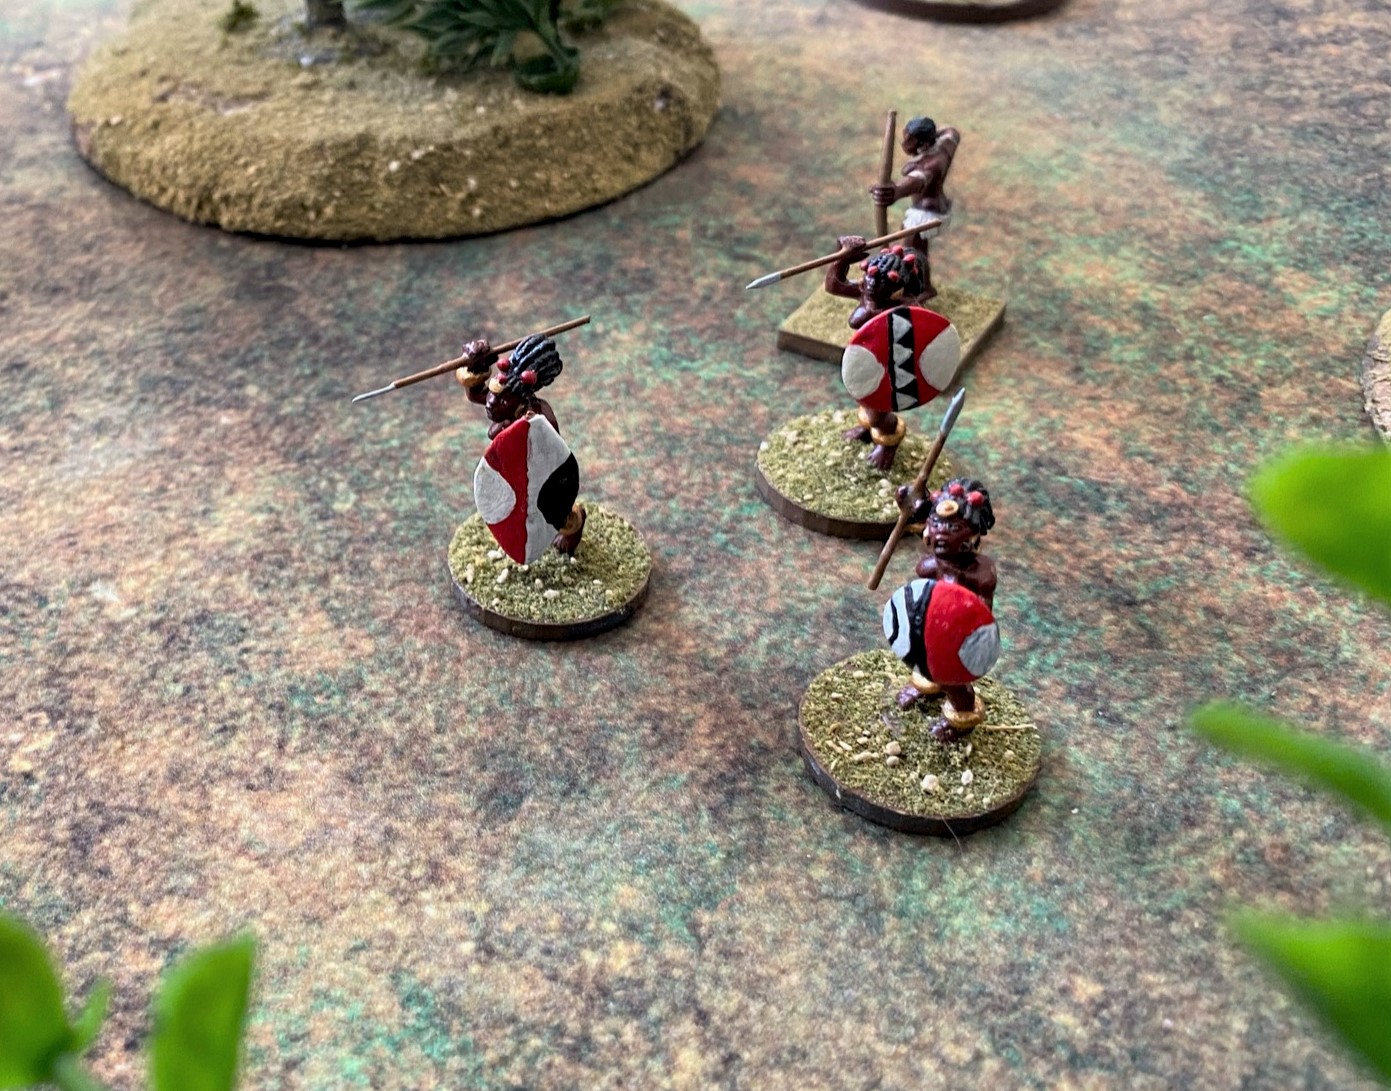
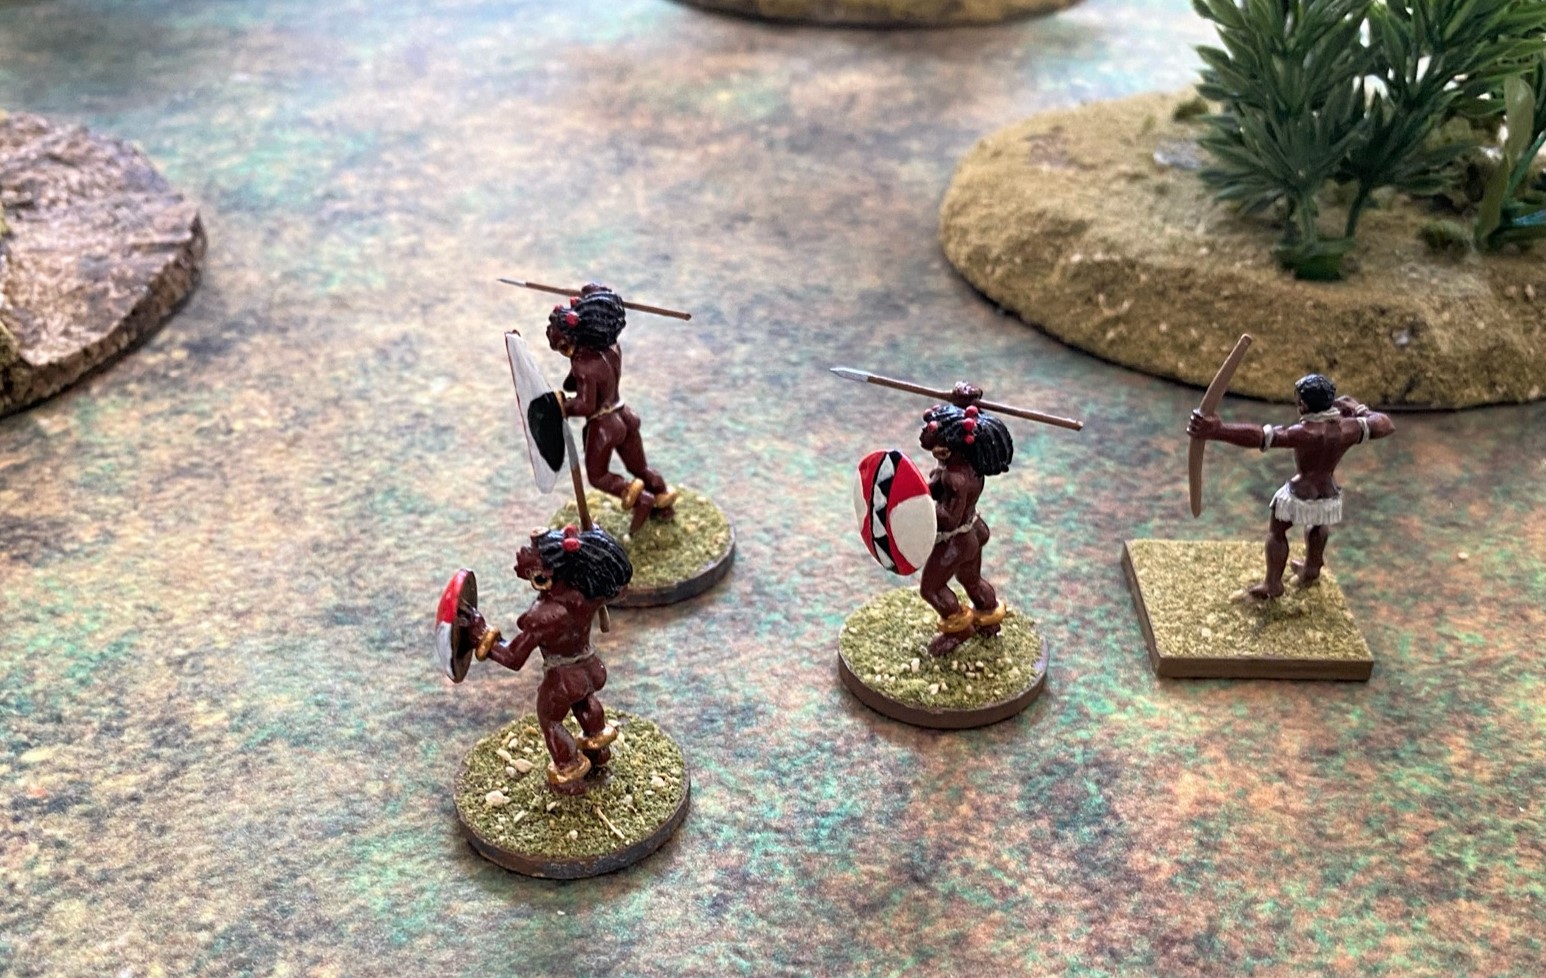
My star character is Nomusa, a chief’s daughter. The chief has allowed her to form a small group of unmarried female warriors. These young ladies have sworn they will not marry until they have slain an enemy.
Nomusa’s Band
| # | Name | Profession | Rep | Class | Weapon |
|---|---|---|---|---|---|
| 1 | Nomusa | Leader | 5 | Melee | One-hand Melee Weapon |
| 2 | Thandiwe | Native | 5 | Melee | One-hand Melee Weapon |
| 3 | Sipho | Native | 4 | Melee | One-hand Melee Weapon |
| 4 | Nomalanga | Native | 4 | Melee | One-hand Melee Weapon |
| 5 | Bunjiwe | Native | 4 | Missile | Tribal Musket |
| 6 | Qalani | Native | 3 | Missile | Bow |
The European Adventurers
While most of the Europeans operate out of Mission St. Mary, Cameron Watson uses the Napondi River Trading Station on the delta of the Napondi River as his base of operations. He has in his possession a diamond said to have been found lying on a path above the rapids. He has heard stories of gems the size of a man’s hand, the treasure of Madhabahu ya Radi. According to legends, the treasure is nestled between the breasts of Nomagugu. To find Madhabahu ya Radi, an expedition has to endure many hardships and dangers – the most dangerous being crossing the lands of the Okbona.
At the start of the campaign, each side begins with a Major Morale score of four. For the first patrol mission, the adventures will have four PEFs (possible enemy forces) which could resolve into four groups. In addition, if doubles are rolled during activation, another PEF is generated. Rather than trying to guess how many doubles could be rolled on the activation rolls, I’ll pause the game and create those groups on the fly. Since I know there will be four PEFs, I’ve created four groups.
Cameron Watson’s Expedition – PEF A
| # | Name | Profession | Rep | Class | Weapon |
|---|---|---|---|---|---|
| 1 | Cameron Watson | Adventurer | 5 | Missile | European Rifle & Pistol |
| 2 | Rodger Timmons | Adventurer | 4 | Missile | European Rifle |
| 3 | Duma | Guide (Ruga Ruga) | 4 | Missile | Tribal Rifle |
| 4 | Kobe | Local (Askari) | 4 | Missile | Tribal Rifle |
| 5 | Musa | Local (Askari) | 4 | Missile | Tribal Rifle |
| 6 | Mbita | Civilian (Bearer) | 3 | Melee | Unarmed |
Jean-Paul LuRue’s Party – PEF B
| # | Name | Profession | Rep | Class | Weapon |
|---|---|---|---|---|---|
| 1 | Jean-Paul LuRue | Adventurer | 4 | Missile | European Rifle & Pistol |
| 2 | Lucien Stuart | Adventurer | 4 | Missile | European Rifle |
| 3 | Sefu | Guide | 4 | Missile | Tribal Rifle |
| 4 | Hamidi | Local | 4 | Missile | Tribal Rifle |
| 5 | Busar | Local | 3 | Melee | One-hand Melee Weapon |
Stanley Burnett’s Party – PEF C
| # | Name | Profession | Rep | Class | Weapon |
|---|---|---|---|---|---|
| 1 | Stanley Burnett | Adventurer | 4 | Missile | European Rifle & Pistol |
| 2 | Ted O’Breen | Adventurer | 4 | Missile | European Rifle |
| 3 | Jamba | Guide (Ruga Ruga) | 4 | Missile | Tribal Rifle |
| 4 | Rajabu | Local (Askari) | 4 | Missile | Tribal Rifle |
| 5 | Zawadi | Local | 3 | Melee | One-hand Melee Weapon |
Benjamin Gray’s Party – PEF D
| # | Name | Profession | Rep | Class | Weapon |
|---|---|---|---|---|---|
| 1 | Benjamin Gray | Adventurer | 4 | Missile | European Rifle & Pistol |
| 2 | James Flanaghan | Adventurer | 4 | Missile | European Rifle |
| 3 | Thomas Henry | Adventurer | 4 | Missile | European Rifle |
| 4 | Muhammed | Guide | 4 | Missile | Tribal Rifle |
| 5 | Tambo | Local (Askari) | 4 | Missile | Tribal Rifle |
Terrain
Terrain placement is slightly different from other THW table top rules. You roll a D6 and add two to the result. This tells you how many sections will have terrain. The type of terrain and exactly where it is placed is up to the players, the only hard rule is that 50% of a section containing terrain must be covered by terrain. The encounter being played may modify or add specific terrain.
The Patrol Encounter has you place the terrain as normal and then roll to see which table edge will contain sections 7, 8 and 9. If you don’t trust your own judgement in placing the terrain, you can roll a D10 to select which section will have the terrain. I rolled a three and then added two, indicating five sections of the table will have terrain.

Here’s where I began to develop a somewhat alternate way to play the game. I don’t have space for a dedicated gaming table. My choices are to place 2’x2’x1″ insulation foam boards forming a wargame board on top of my bed or on top of a dining table crammed in the breakfast nook. This means there are sides of the table I can’t access. To solve this, I sketched a map divided into nine sections and drew the terrain where it was supposed to go. Then after determining which side of the map would have Sections 7, 8, and 9, I would just rotate the map to fit my table top.
PEF Movement
PEF movement is different in Fortunes Won and Lost from most other THW games. Instead of moving across the table top in inches as if it were a character, PEFs move by Section. For example, depending on a die roll, a PEF in Section 1 could move forward into Section 4, or move to the side into Section 2, or stay put. This speeds up game play in eliminating the meticulous movement of PEFs.
This erupted into a brainstorm – imagine a giant sandstorm in my brain shaking loose some cobwebs. Instead of moving PEF markers on a table, I could make counters for the PEFs and track their movement on the map I had drawn.
A Table Top Battle Board?
Okay, stay with me for a moment. Shortly after Fortunes Won and Lost was published, THW began releasing rules that could be played on a battle board, usually 8″x12″. Like most THW table top games, Fortunes Won and Lost is played on a 3’x3′ area. The table is divided into nine 12″ square sections. Figures move in 4″ increments – figures on foot have a normal movement of 8″, mounted figures have a normal movement of 16″. This means that if I use graph paper for my map, I can also plot the movement of my groups on the map. Using this method, I can play on paper until an In-Sight occurs and then set up the 12″x12″ Section on the table with it’s terrain.
With this method, I have a nice compromise to my space problems. I don’t have to set up a complete table. I can just set up one of my 2’x2′ insulation boards, place the relevant terrain and be able to use figures from my collection.
I guess I’m mentioning this alternative method for those who might dismiss this wonderful game because they don’t have the space for a 3’x3′ playing area, or they can’t keep a 3’x3′ area set up for gaming for the time it would take to play a game, OR (and this is a big one for some gamers) they don’t have enough terrain for an entire table. For these people, the game can be played with a sheet of paper and a 12″x12″ surface.
For this article, I will be using the full table top method.
The Patrol Encounter
The campaign is made up of a series of encounters. Accomplishing an encounter’s objectives raises your major morale, losing an encounter reduces your major morale. The outcome of an encounter determines the next encounter you play. For example, the first encounter is a Patrol Encounter. If I win, my next encounter will be the Raid Encounter where my character will be the raider. If I lose, my next encounter will be a Defend Encounter where my character defends a village or camp against raiders.
To successfully complete the Patrol Encounter, my character must spend an activation in the center of each of the nine sections of the table.

Enough Prep talk, time to play the game – those pesky white people are up to no good!
Turn One
The game starts with terrain in sections 1, 3, 4, 6, and 7 leaving a corridor of open savannah in sections 2, 5, 8, and 9. PEF A is in Section 4, PEF B is in Section 2, PEF C is in Section 5 and PEF D is in Section 1. The Okbona start on the table edge of Section 9.
The PEFs win the activation roll, but fail to activate. The Okbona move to the center of Section 9 and secure it.
Turn Two
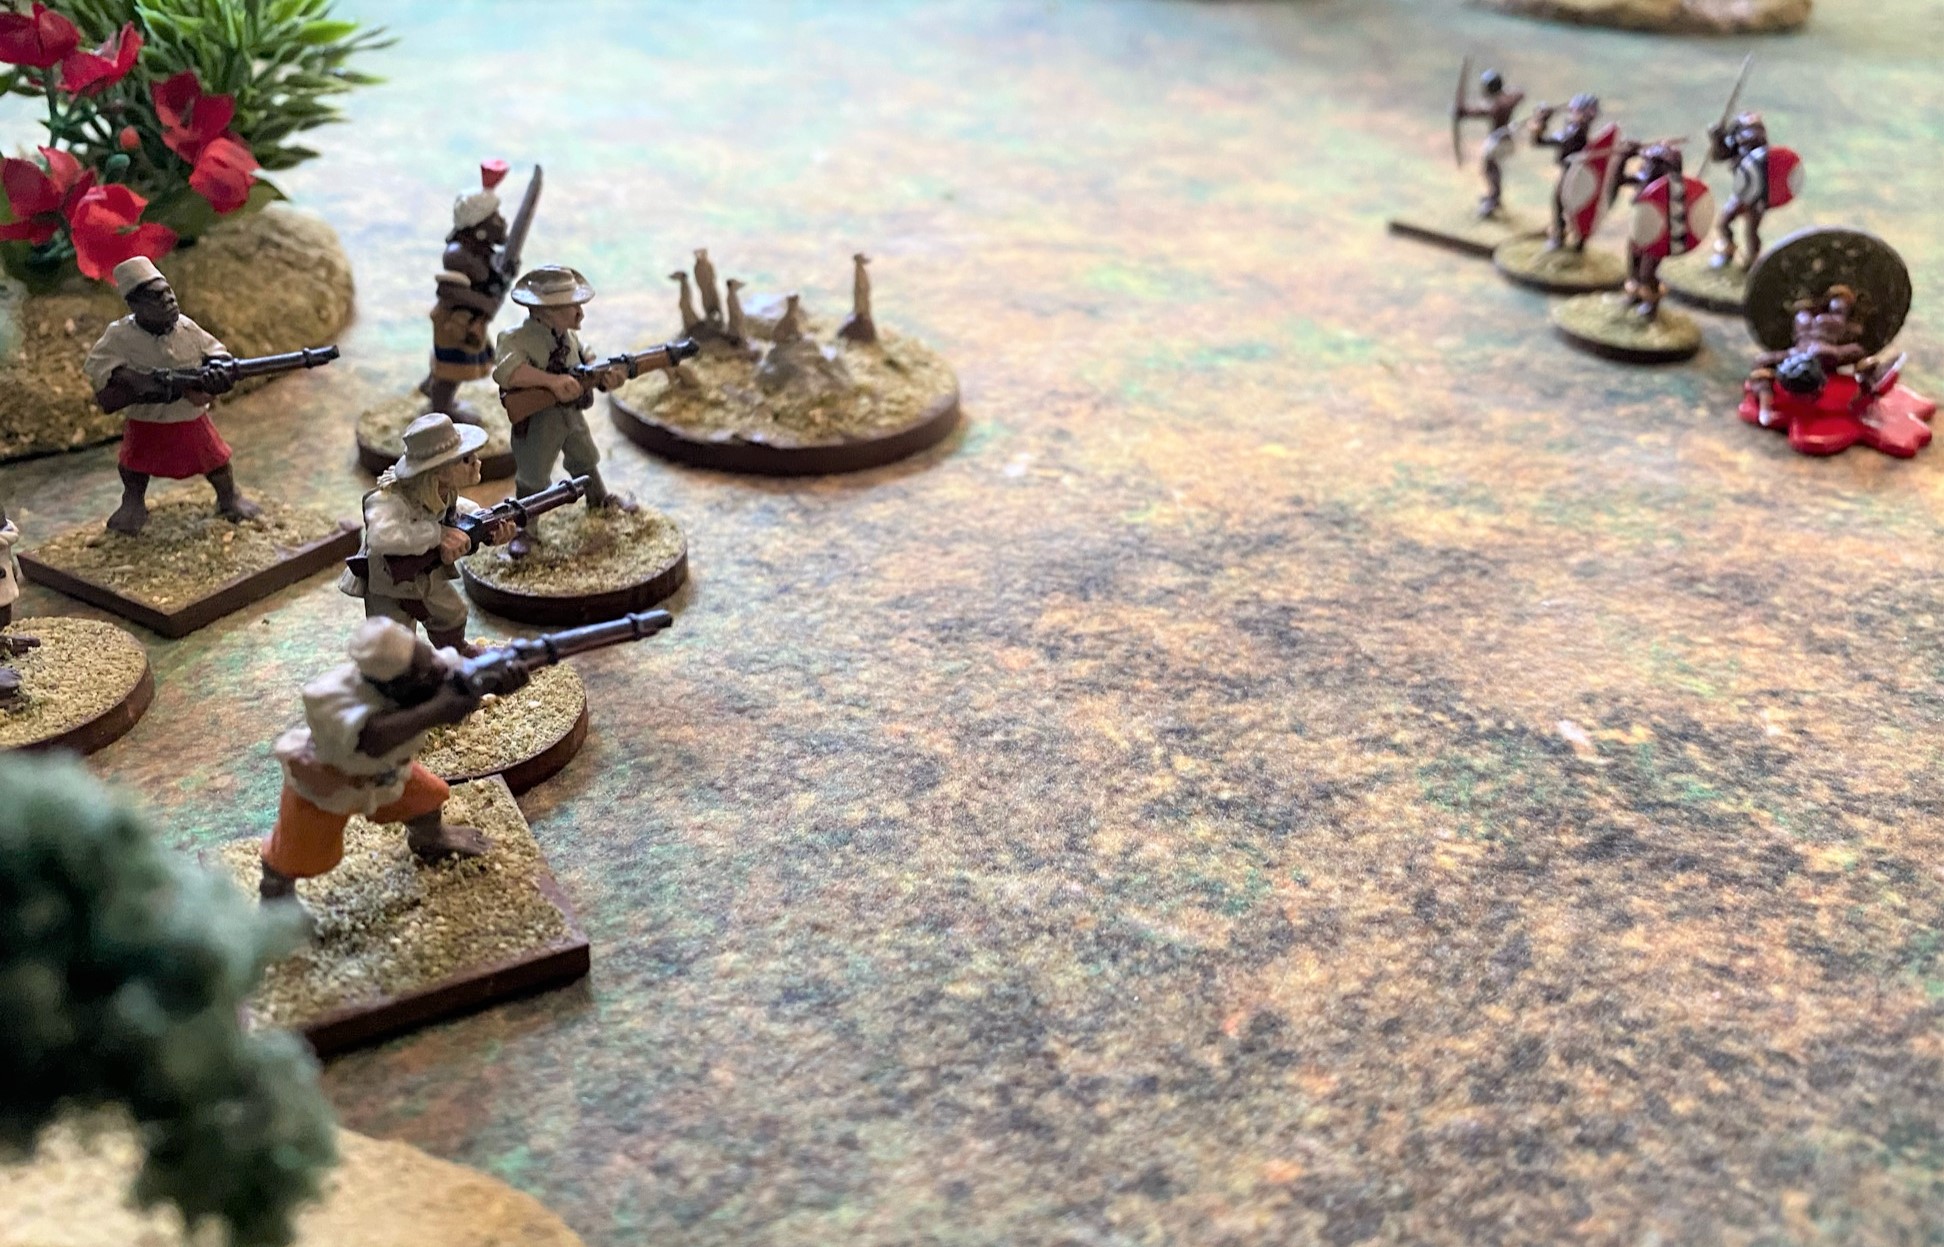
Again, the PEFs win activation, but fail to activate. The Okbona move into Section 8, in sight of PEF C. PEF C successfully resolves into Stanley Burnett’s party. Burnett fires, but misses. O’Breen fires and misses. Jamba, the Ruga Ruga guide fires and also misses.
The Okbona are out of range with their weapons and Burnett’s party is too far away to charge.
When the Will to Fight test is taken, the Okbona pass with ease on their dice. But the European Adventurers fail with a roll of double sixes. Their dice have been rolling high. As a result, Burnett’s party loses the will to continue and leave the table.
This leaves the Okbona in sight of PEF B. Again, a high dice roll results in only one D6 passing, so PEF B resolves into “Something is Out There” and is removed from the board.
Turn 3
The Okbona fail to activate. PEF A moves to Section 7 and PEF D stays in Section 1.
Turn 4
The Okbona win activation and move to the center of Section 8 to secure it.
PEF A moves into Section 8 and resolves into Cameron Watson’s party. PEF D remains in Section 1.

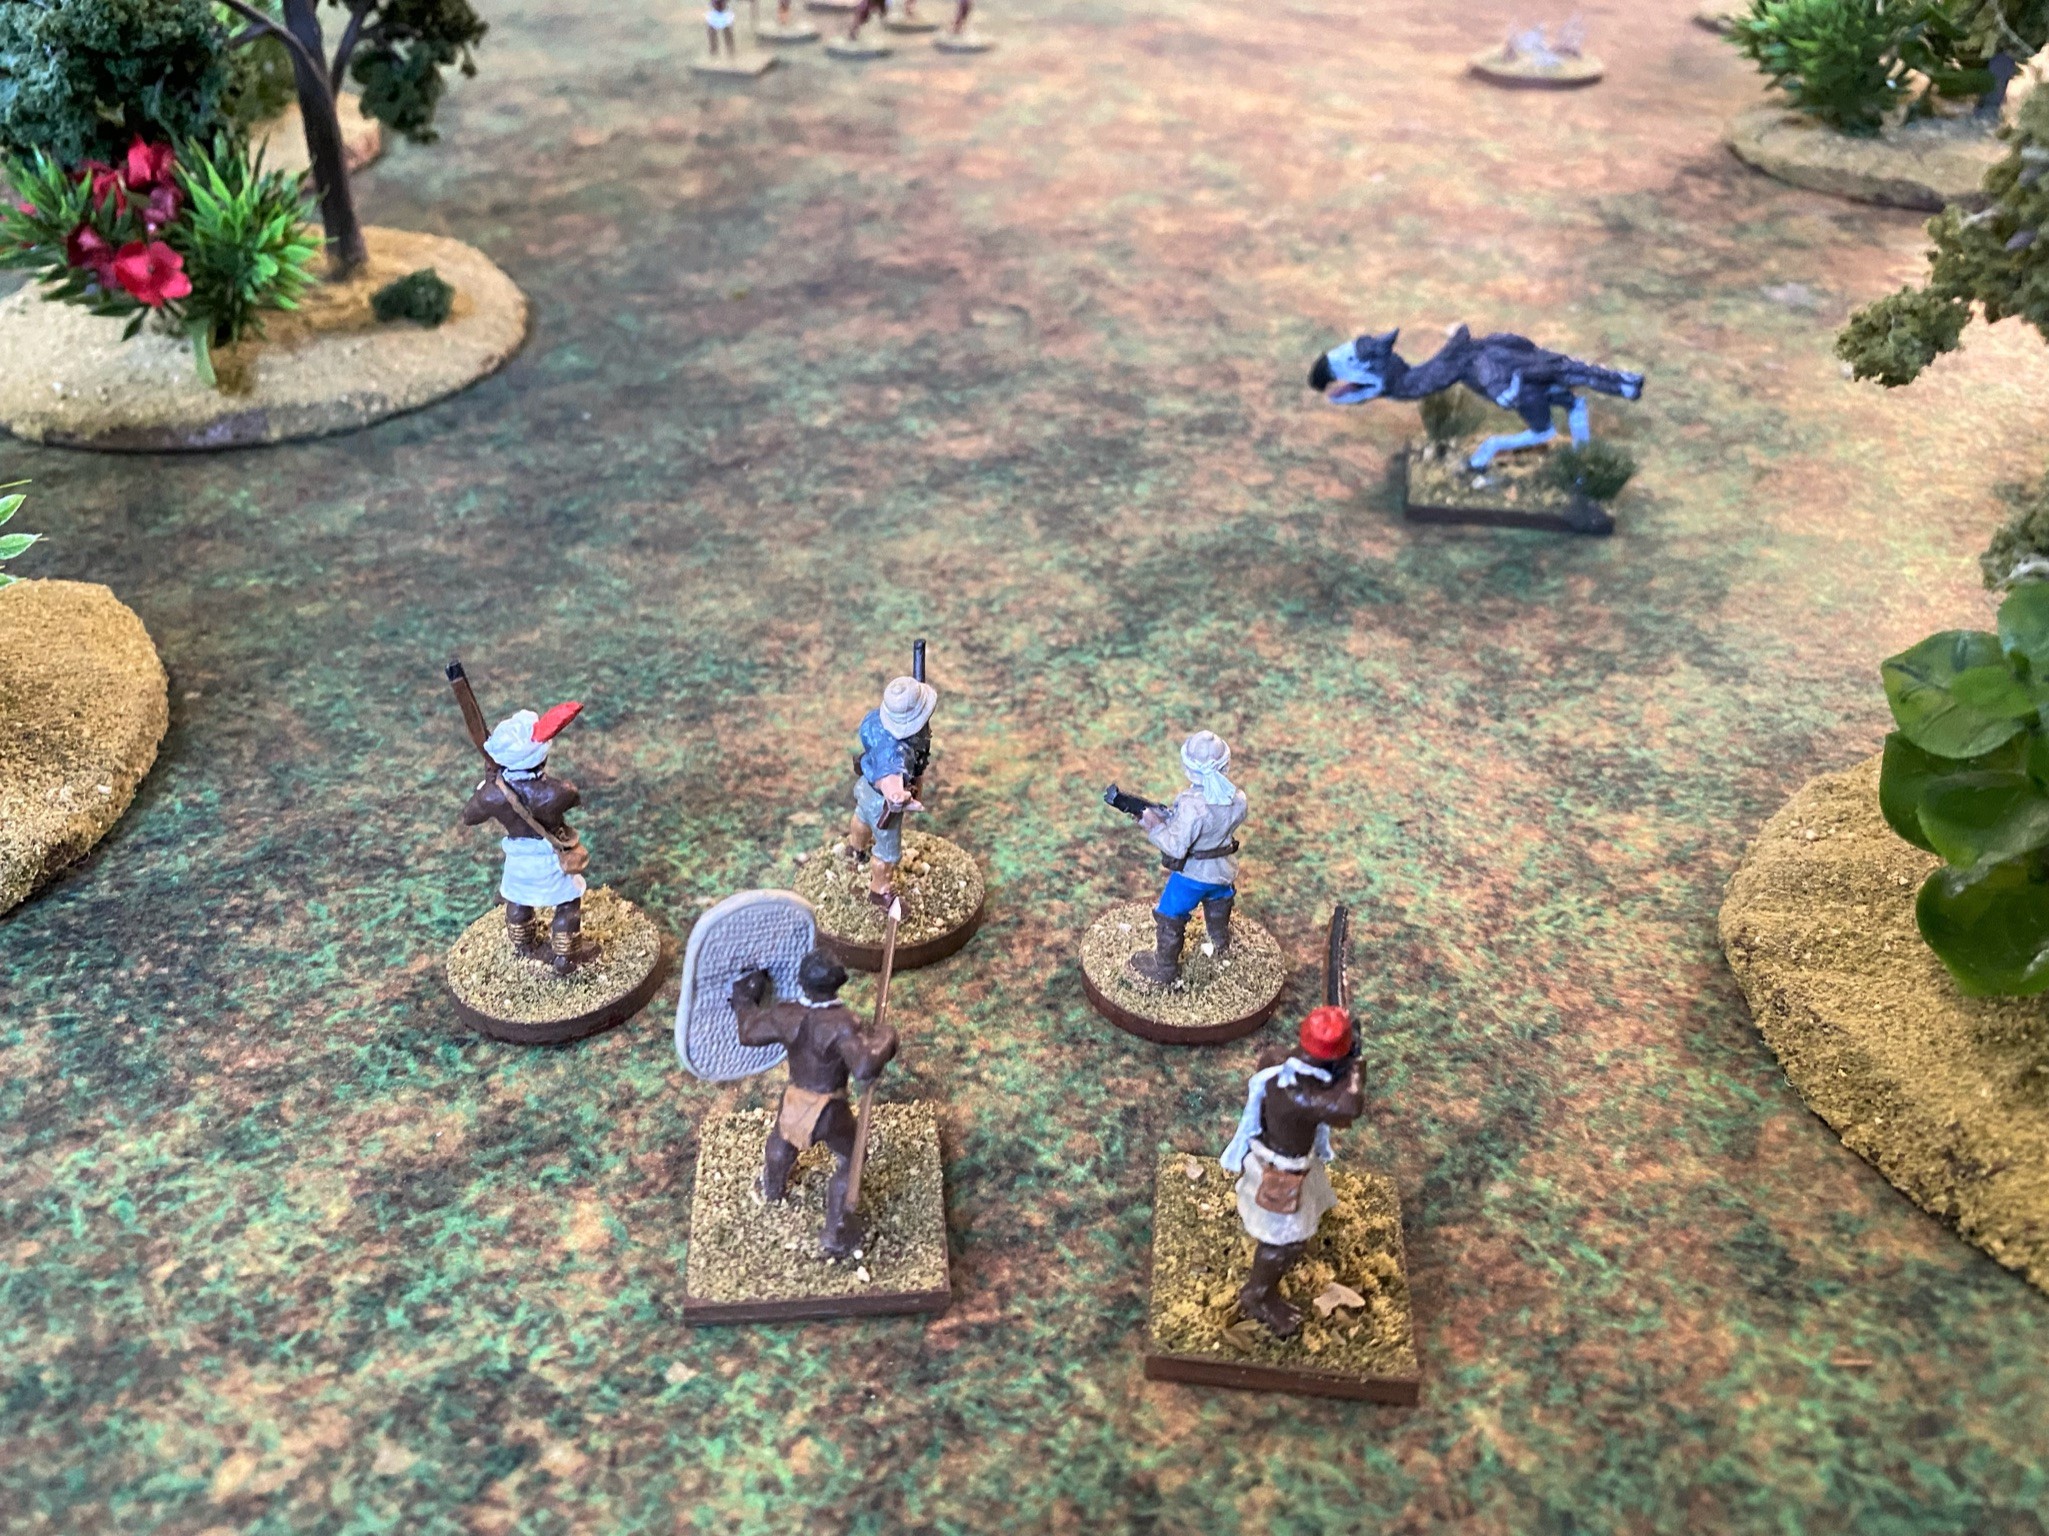
Cameron Watson fires at Bunjiwe. She is hit and dies immediately (OD). Rodger Timmons takes his turn and fires at Nomalanga who joins Bunjiwe in being OD. Duma, the Ruga Ruga guide, fires at Nomusa and misses. The Askari, Kobe, fires a Thandiwe and misses.
The Okbona easily pass the Will to Fight test and all of Watson’s party passes, except the bearer who flees.
Turn 5
The Okbona win the activation and have their chance at vengeance. Qalani unleashes an arrow which forces Duma to Duck Back. The rest of the Okbona charge shocking Watson’s party so much that they rush their fire and miss. Nomusa kills Watson (OD) and Thandiwe kills Musa even faster (OD). Sipho struggles with Timmons, but eventually slays him (OD). The Will to Fight is passed by all.

In the Adventurers’ activation. A shaken Kobe takes aim at Sipho and misses. Everyone passes the Will to Fight. PEF D again stays in Section 1 – this PEF continues to either fail to move at all or scores “Move one section away from opponent” and being in the corner, it has no where to go.

Turn 6
The Adventurers win the Activation. Kobe fires and again misses. (The Adventurers are rolling a lot of fives and sixes today.) Duma recovers from Duck Back. PEF D finally moves into Section 4.

The Okbona swarm Kobe. Sipho strikes first killing him (OD). After the Will to Fight test is taken, Duma flees into the jungle.
Turn 7
The Adventurers win the activation. PEF D moves into Section 7 within sight of the Okbona and resolves into – nothing?
The Okbona move into Section 7 and secure it.
Game Over, Man
Though this game went seven turns, it played very quickly. The European Adventurers rolled a boat load of sixes. It reminds me of many many years ago when I took my son to a game store to play Warhammer. There was a bucket of dice on the counter next to the cash register. A young man, a teenager, was rolling dice over and over. I asked him what he was doing and he said he was going to buy dice that only rolled sixes. Six was the holy number for playing Warhammer. I was an IT manager at the time and the incident reminded me of the floor function at the time.
Dice are used as a randomizer in games and if you have dice that only roll sixes, you may well find yourself at a disadvantage in a well designed game.
These dice are orange, from a cube of orange dice. When I place them back in the cube, hopefully, the next ones I pick will perform better.
As to the game, it was designed to be played fast. It was the first of the THW games I had seen with an Action Table and the number of reaction tests had been reduced. In melee there seems to be a higher chance at scoring Obviously Dead than Out of the Fight.
As with Mission St. Mary, the non-native forces are better at shooting and should keep the natives at arms length. If the natives do charge into melee, expect savage butchery. I think if Bennett’s party had not lost the Will to Fight (thanks to double sixes), the game would have ended swiftly with the Adventurers eliminating the Okbona before they could get into charge range.
So if you had to choose only one Colonial Expansion era game, would you choose Mission St. Mary or Fortunes Won or Lost? Wait! There’s still more THW Classics rule books to play – Colonial Adventures is next.

If you enjoy these posts, or not, please leave a comment. Your comments are valuable in helping me determine what to write next. Until next time, keep rolling under your Rep and only roll a six when needed!
If you enjoy the content on the Atomic Floozy Adventures blog, please consider making a small donation to help keep the blog growing.
Choose an amount
Or enter a custom amount
Your contribution is appreciated.
Or if you prefer using PayPal, use this button:
The Okbona Expedition post
If you enjoyed this post, please consider making a small donation to help keep the Atomic Floozy Adventures blog growing. Thanks!
$1.00

Comments
4 responses to “FW&L – The Okbona Expedition”
I’ve been watching as you modify THW games slightly to do things they weren’t originally intended to do. It shows that these rules are versatile and flexible (not that you are an evil, non-rule abiding person). I’ve got my own things I’d like to do. For instance, I read one account of the 1940-41campaign in Albania where it took me a while to realize that the Greek infantry company was basically operating at platoon strength, just the captain and 35 or so men due to casualties (sick, wounded, dead, frostbitten). I think NUTS! would work just fine for this, even though it says it is a platoon level game. Same with some of the other THW rules, I think they are flexible enough to allow me to do what I want (like have a barbarian hero) not just the things specifically described in the rules.
I find myself making adjustments regardless of ruleset. You will notice that NUTS! is written for the late war period, 1944 – 1945. So, when I started my Eastern Front Rzev campaign set in 1942, I had to modify the Soviet squad structure in NUTs! to reflect 1942’s larger squad configuration. I also had to modify vehicle stats as almost all of the Soviet armor available in 1941 & 1942 had been phased out by 1944. So far none of my tinkering with the rules have broken any of the mechanics, though some of my games do last longer than 2 hours.
THW writes mostly for the casual gamer and most casual gamers know very little about anything before D-Day.
I have a friend that has a Box of Borg Miniatures from Star Trek Which he wants to use for Adventures in New Hope City Which 5150 rules would you suggest he get? Also I’m interested in a set of THW rules for Small group of encounters for the Colonial Period between Adventures and Natives Arabs etc. Please let me know your suggestions for Colonial Rules. Thank you Richard Nelson
Have your friend take a look at the new edition of 5150 New Beginnings, it not only updates 5150 Urban Renewal, but also includes the space travel rules from the 5150 No Limits series and 5150 Fringe Space. As a bonus, it has the boxing rules from 5150 Alien Fight Night.
As for Colonial Rules, if you also want to include hunting dinosaurs, big game & include prehistoric people, then Mission St. Mary. If you want to do a campaign of a series of engagements between groups of adventurers, European military, natives, Arab traders, etc. then pick Fortunes Won & Lost.